
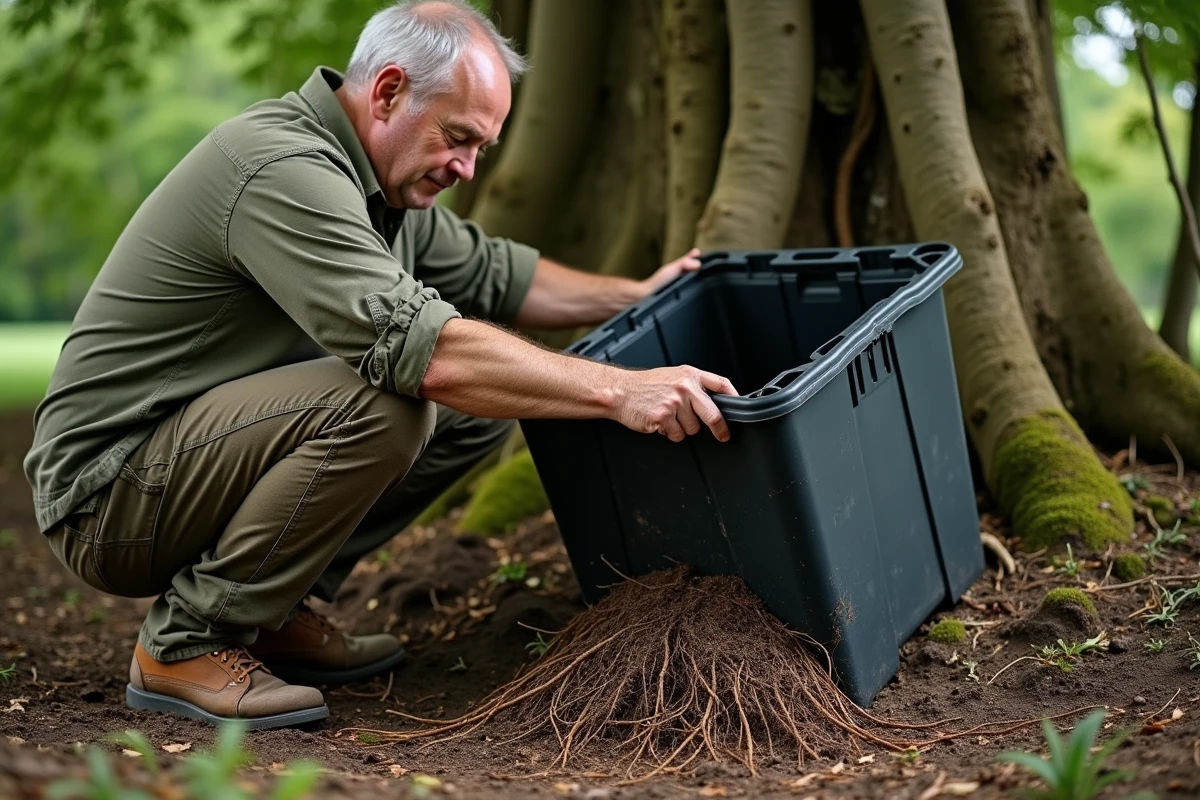
A composter placed directly on the ground, at the back of the garden, near an old birch or a hedge of privet: after a few months, you lift the bin and discover a dense network of roots that has colonized the entire bottom. The compost is trapped in a tangle of wood, difficult to sift and use.
This root problem in the composter affects the majority of installations in direct contact with the soil, especially when certain tree species are nearby.
Recommended read : How to Effectively Maintain Your Renault Clio 2: Tips and Practical Advice
Why some species colonize the composter faster
Not all roots are equal. Willows, birches, and acacias are particularly aggressive: their creeping root system quickly advances towards any source of nutrients and moisture. A composter offers exactly that, with the added bonus of constant heat that stimulates growth.
Experiences from composting dry toilets show that roots colonize composters rich in highly nitrogenous materials, such as urine or fresh green waste, even faster. The warm, moist, and nutrient-rich mix acts like a magnet for the roots of nearby trees.
Recommended read : How to Estimate Your Net Monthly Salary from Your Gross Income
You can find more tips on Info Jardinage to identify the most problematic species in your own garden. The first concrete action is to measure the distance between the composter and the nearest tree: if it is less than two or three meters for a birch or a willow, the risk is almost certain.
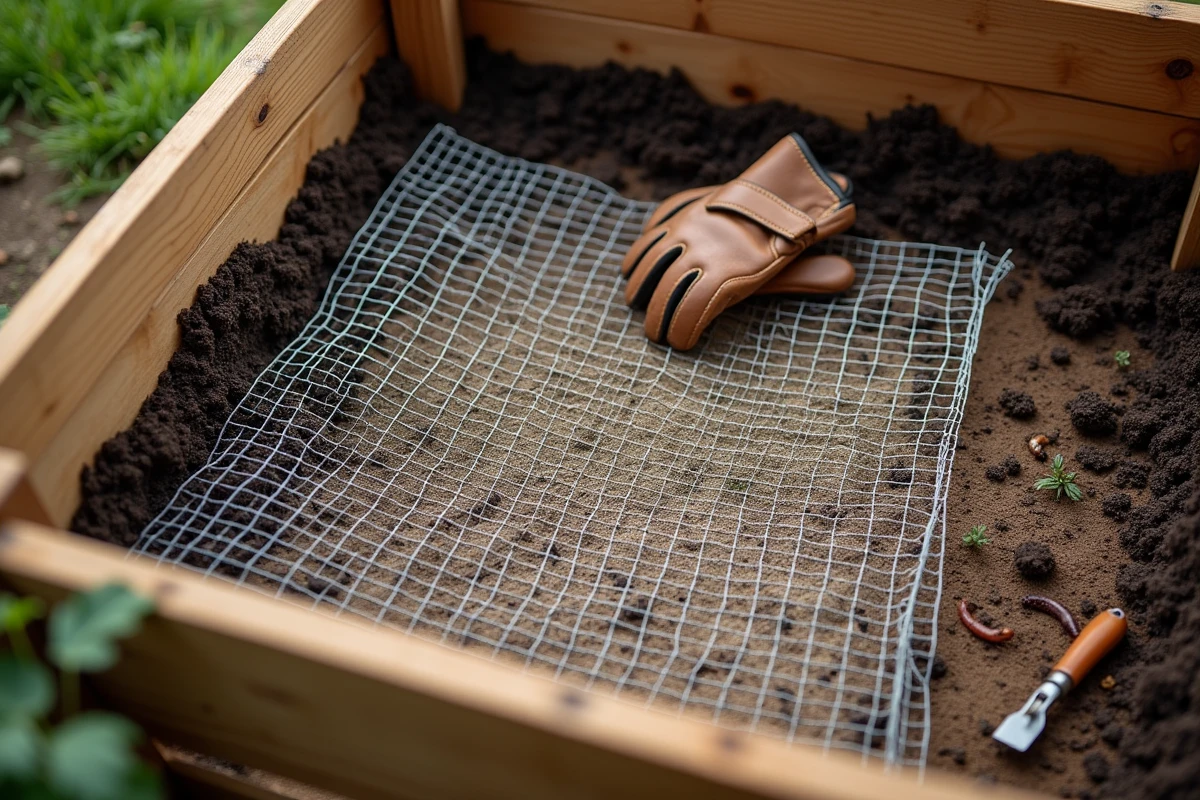
Mesh or geotextile at the bottom of the composter: which root barrier to choose
Placing the composter on a concrete slab blocks roots, but also earthworms and soil microfauna. You then lose a good part of the biological activity that accelerates decomposition. This is why several community guides now recommend a smarter compromise.
Drainage base separated from the soil
The idea is to install a metal mesh or fine mesh plastic trellis under the composter. Worms and moisture can pass through, but roots cannot. This creates a draining base that maintains contact with soil life without opening the door to creeping roots.
To keep the mesh effective, its openings must be tight enough (a few millimeters). A standard chicken wire allows fine roots to pass through in a few weeks. Instead, aim for galvanized welded wire or rodent-proof mesh, which also resists corrosion in a humid and acidic environment.
Geotextile and opaque tarp around the composter
Some gardeners create a root-free zone around the composter by laying down geotextile or an opaque tarp on the ground, in a wide band (about half a meter to a meter all around the bin). This peripheral barrier blocks surface roots that progress horizontally towards the nutrient source.
Feedback varies on this point: standard low-weight geotextile can be penetrated in one season by vigorous roots. It is better to use thick geotextile or a real root barrier made of high-density polyethylene, buried vertically to about thirty centimeters.
- Fine mesh metal grid under the bin: blocks roots from below while allowing worms and microorganisms to pass through.
- Thick geotextile or root-proof tarp buried vertically around the composter: prevents lateral progression of creeping roots.
- High-density polyethylene barrier: the most durable solution for aggressive species like willow or birch, but more expensive to install.
Raised composter: eliminate contact with the ground
The most radical solution to prevent roots from invading the compost is to completely eliminate direct contact with the soil. Raised composters (on legs, pallets, or a growing table) are becoming popular in urban gardens and small plots.
The bin is placed on legs or concrete blocks, with a gridded bottom that ensures drainage without ever touching the ground. Roots simply have no access to the compost. This type of installation also limits rodent intrusion and makes it easier to harvest mature compost from below.
Limitations of the above-ground composter
A raised composter dries out faster than a bin placed on the ground. Moisture rises less, and colonization by earthworms is slower (they often need to be introduced manually). This is compensated by regularly watering the pile and adding a layer of damp brown cardboard on the surface to maintain humidity.
The other constraint is structural: a full composter is heavy. The support must be solid, stable, and able to last without sagging. Untreated pallets placed on concrete blocks work well for a modest-sized bin.
Brown cardboard and mulching: blocking roots at the source
A simple and often underestimated technique is to use brown cardboard as a root barrier around and under the composter. Cardboard blocks light and slows down the germination of weeds and the progression of surface roots.
Published observations show that a thick layer of cardboard mulch can eliminate almost all unwanted weeds in the treated area. When applied under the composter in several layers, it slows down the penetration of roots while the compost matures. The cardboard eventually decomposes, which necessitates renewal, but it nourishes soil life as it breaks down.
- Place three to four layers of unprinted brown cardboard under the bin, directly on the soil.
- Extend the cardboard half a meter around the composter and cover it with mulch (dead leaves, shredded material) to keep it in place.
- Renew the cardboard every six to eight months, during the turning or emptying of the composter.
This method works especially well for fine roots and weeds. When facing a very close birch or willow, it is combined with a metal grid at the bottom for complete protection.
The choice of barrier depends on the neighboring tree species and the size of the garden. A small urban vegetable garden leans towards a raised composter. A large plot with trees that have creeping roots benefits from combining a grid at the bottom, buried geotextile around the perimeter, and cardboard under the bin. In any case, checking the underside of the composter once a year remains the simplest action to intervene before the roots take over.